Easy to confirm!

Easy to confirm!

A jQuery confirm plugin

I’m re-writing some components for our  world-wide selling Teamwork, and I was in the need to have a nicer way to confirm some “dangerous” user actions.

The standard JavaScript solution is something like

if (confirm(“do you want to destroy everything?”))
… <em>here the code for destroying</em>

While the code is very simple, the popup alert is unfashionable and old-smelling.

The best solution I found is the Nadia Alramli’s jQuery confirm plugin that I have already used massively in Licorize.

The first great idea in the Nadia’s plugin is that the confirm question is shown exactly where you clicked for the action.

The second idea is that the “confirm” is just “applied after” your code behavior.

Let se the simplest example (from Nadias’ blog):

// The action.
$('a').click(function() {
  alert('click');
  return false;
});
 
// The most simple use.
$('a').confirm();

As you can see, first you bind the event normally, then you will apply the confirm.

This approach is very nice, but its is very “javascript oriented”; what I mean is that you need a js piece of code for setting up the confirm, and this is a little bit rigid for an inline usage.

Example:

<button onclick="destroyAll()">

where “destroyAll” is your function.

So I wrote this little jQuery plugin that can be used like this:

<button onclick="$(this).confirm(destroyAll)">

Here the code:

$.fn.confirm = function(action, message) {
  if (typeof action != "function") return;
  this.each(function() {
    var el = $(this);
    var div = $("<div>")
      .addClass("confirmBox")
      .html(message ? message : i18n.DO_YOU_CONFIRM);
    div.css({ "min-width": el.outerWidth(), "min-height": el.outerHeight() });
    div.oneTime(5000, "autoHide", function() {
      $(this).fadeOut(100, function() {
        el.show();
        $(this).remove();
      });
    });
    var no = $("<span>")
      .addClass("confirmNo")
      .html(i18n.NO)
      .click(function() {
        $(this)
          .parent()
          .fadeOut(100, function() {
            el.show();
            $(this).remove();
          })
          .stopTime("autoHide");
      });
    var yes = $("<span>")
      .addClass("confirmYes")
      .html(i18n.YES)
      .click(function() {
        $(this)
          .parent()
          .fadeOut(100, function() {
            el.show().oneTime(1, "doaction", action);
            $(this).remove();
          })
          .stopTime("autoHide");
      });

    div
      .append("&nbsp;&nbsp;")
      .append(yes)
      .append("&nbsp;/&nbsp;")
      .append(no);
    el.hide().after(div);
  });

  return this;
};

few lines of CSS for the sake of completeness:

.confirmBox{
    display:inline-block;
    z-index:10000;
    vertical-align:middle;
    text-align:center;
    font-size:larger;
    font-style:italic;
    color:#a0a0a0;
  }
  .confirmBox .confirmNo{
    color:#e06060;
    cursor:pointer;
    font-weight:bolder;
  }
  .confirmBox .confirmYes{
  color:#60e060;
  cursor:pointer;
    font-weight:bolder;
  }

and two lines for internationalization:

var i18n = {
YES:"Yes",
NO:"No",
DO_YOU_CONFIRM:"Do you confirm?"
};

See a Demo page here

This component is released under MIT license.

Your feedback will be appreciated.

To JSON or not to JSON

How to simply convert a sqlite database to JSON

Last week my collegue Matteo (aka pupunzi) was porting an iPad application (booo!) to HTML5 (yeah!).

The iPad application was a virtual museum that was using a sqlite dabatase for reading data relative to rooms, biography, history and so on.

Even if sqlite is internally supported by some browsers (e.g. Chrome) the easiest way to read data in javascript is to have a JSON object.

I wrote a simple java code to dump the whole database into a JSON object.

import net.sf.json.JSONObject;
import net.sf.json.JSONArray;
import java.sql.*;
import java.util.List;
import java.util.ArrayList;
import java.io.FileOutputStream;
public class DB2JSON {

  public static void main(String[] args) {

    if (args.length&lt;1)
      return;
    Connection conn = null;

    try {
      String dbFile = args[0];
      JSONObject ret = new JSONObject();
      Class.forName(&quot;org.sqlite.JDBC&quot;);
      conn = DriverManager.getConnection(&quot;jdbc:sqlite:&quot; + dbFile);
      Statement stat = conn.createStatement();

      ResultSet tables = stat.executeQuery(&quot;SELECT name 
         FROM sqlite_master 
         WHERE type=&#039;table&#039; ORDER BY name;&quot;);
      List tableNames = new ArrayList();
      while (tables.next()) {
        tableNames.add(tables.getString("name"));
      }
      tables.close();

      for (String tableName : tableNames) {
        JSONArray jsa = new JSONArray();

        ResultSet rows = stat.executeQuery("select * from " + 
           tableName + ";");

        while (rows.next()) {
          JSONObject row = new JSONObject();
          ResultSetMetaData meta = rows.getMetaData();
          for (int i = 1; i &lt;= meta.getColumnCount(); i++) {
            row.element(meta.getColumnName(i), rows.getObject(i));
          }
          jsa.add(row);
        }

        rows.close();
        ret.element(tableName, jsa);
      }

      conn.close();

      // result on console
      System.out.println(ret.toString());

      //result on file
      FileOutputStream fos = new FileOutputStream(dbFile+&quot;.json&quot;);
      fos.write(ret.toString().getBytes());
      fos.close();     

    } catch (Throwable e) {
      try {
        if (conn != null)
          conn.close();
      } catch (SQLException s) {
      }
      e.printStackTrace();
    }
  }
}

The resulting JSON object will have a property for each table containing an array of records. Different types of properties are supported (String, int, long, dates etc.)

There are two dependencies to external libraries:

  1.  http://json-lib.sourceforge.net/
  2. http://www.zentus.com/sqlitejdbc/

Enjoy.

P.S.: the pupunzi’s porting result is an HTML5 application that runs everywhere and it is looks even more beautiful than the iOS one Smile !

How to destroy an evil presence and live better

How to destroy an evil presence and live better


Yesterday while I was biking my dog  across Cascine park in Florence mumbling about a new product idea, my eyes was attracted by some strange orange points in the autumnal yellow carpets. I got off the bike to have a closer look. WOW! there was thousand of alkekengi fruits on the ground.

Alkekengi (Physalis alkekengi L.) is a plant from the same family of tomatoes, it is  invasive and an alien specimen in Italy, it is something negative!

Let me explain how to “eradicate” this evil presence:


1) pick-up some dozens of alkekengi fruits with their orange “lanterns”

20111106-IMG_0576

2) pop the lanterns and get the balls “naked”, but without removing the ”leaves”

20111106-IMG_0590 20111106-IMG_0594

20111106-IMG_0595 20111106-IMG_0593

3) prepare a “bain marie” for dark chocolate. If you don’t have the right pot you can stack a metal bowl on a boiling water pot

20111106-IMG_0586 20111106-IMG_0587

3) when chocolate melts, start dipping alkekengi balls one at a time.
Use folded leaves for holding them

20111106-IMG_0596 20111106-IMG_0597

4) then place the hot ball on a baking paper sheet to let them cooling down

20111106-IMG_0599

5) in the meanwhile get some hot chilies (I used real small ones that decide to happily colonize a lemon vase), smash them in a mortar and then add them to hot chocolate. Stir to amalgamate.

20111106-IMG_0600 20111106-IMG_0601 20111106-IMG_0602

6) now you are ready for the last chocolate passage.

20111106-IMG_0604

7) let chocolate solidify and eventually repeat last passage.

The chilled dark chocolate is in perfect balance with the sour flavor of alkekengi.

Now  you are ready to destroy this evil presence!

P.S.: I forgot for the rest of the week-end the fu$#£!…. idea on the new product.

Power of chocolate.

Tassellate: playing on CANVAS

Tassellate: playing on CANVAS

I’ve enjoyed so much playing on HTML5 <CANVAS> that now I cannot stop…


(test demo here)

Now I’m playing on a component that I’d like to use as replacement for the current “weekly review” game on Licorize. If you are wondering about a “game” on a GTD operation like “weekly review”, have a look at Game mechanics for thinking users article by Pietro Polsinelli.

The goal is to transmit the idea of having something to be “cleared”; a picture covered with black pieces should work fine!

The requirement is that the number of pieces covering the image must be pre-determined.

First of all I need an algorithm to “tassellate” the image with random shaped triangles. Actually the triangles are not overlaying, so I divide recursively the space available.

Go have a simple algorithm, first I split the image in two triangles, then I apply to both the recursive splitting.

A single splitting step:image

1) choose a random side

2) find a point (x) on that side, nearly in the middle

3) link the point (x) with the opposite corner and generate two triangles

4) apply splitting on both triangles

here is the code:

image

Then the recursive function: notice that I have to use a queue to “balance” the recursion on both splitted parts, otherwise I will divide only the first triangle reaching the exit condition (x pieces reaced).

image

Then I used my simple Stage object to manage canvas interactions (read lenscape a canvas interaction tutorial for details) as click on triangles, mouse over, etc…

I’ve also added a sound on “remove piece” button, but dealing with the <AUDIO> tag is another history…

Lenscape, a canvas interaction tutorial

Recently I started playing with the HTML5 <CANVAS> object sometimes having fun and sometimes feeling pain. I would like to share here my pains with your all 🙂

image

(see example and bookmarks)

I approached html drawing far in the past when svg was a weak light in the darkness of browser graphics. Mainly due to the lack of IE support for svg at the time I chose to create my own graphic library emulating  pixel drawing with thousands of lilliputian <div>.

In the following years I had only sparse contacts with html graphics but always having in mind the svg approach, where a line, a circle or whatever is a solid xml tag.

e.g: <ellipse cx=”300″ cy=”150″ rx=”200″ ry=”80″ style=”fill:rgb(200,100,50);”/>

this is really “natural” for me, html-writer: every single element has its own tag, and we are all happy!

Last month here, in Open Lab, we decided to start developing our first game (first for the company but not for the people working in it) and we decided to develop it using HTML5!

It’s time for me to resurrect dormant skills, and have a look at what is happening in the world of html gaming.

Surprise! Nobody is using svg for gaming, the main road is deeply tracked through <canvas> fields;  so then I started studying it.

First of all I got a punch in the stomach learning that a canvas is, as the word says, only a place where to “draw” something, not a place where to “store” something. That means that once you have put something in a canvas, there is no way to recall  it, or even worst to detect its presence.

This implies that if you want, for instance, to do something when clicking on a “circle” you cannot “bind” an event on that circle, simply because that “circle” doesn’t exist.  So if you need to interact with objects in the scene you need to work around it.

Actually this tutorial will explain how to approach canvas interaction,  so this will result as a shortcut for avoiding the pain and getting only the fun part!

Disclaimer: I know there are lots of html gaming engines as Aves recently acquired by Zinga, CAAT by HyperAndroid, Strikedisplay by Josh Strike or Impact by Dominic Szablewski (this list is far from complete). So if you are not interested in going in depth in canvas technicalities, this is a good point where to stop reading.

If you are interested in going deeper, first of all I suggest you to have a look at what is happening in the canvas world:  canvasdemos is a great source of inspiration. Then have a look to the canvas element reference, just to taste the complexity…

I chose as final destination of this short trip in the canvas world the construction of a simple application,that emulates a lens moving on a picture. In the meantime I’d like to lay the foundations of my own canvas animation(?) library.

imageSumming up I’m going to realize a lens, that will enlarge a part of an underlying background image.

The lens can be moved over the image, to get a detailed view, using drag&drop.

The first step is to have a large image, larger than the screen (e.g.: 4000 x 2000) with full resolution, and use it as canvas background.

In order to have a canvas background you can use at least two different approaches:

1) using CSS background-image. This is an interesting approach as the background is not in the canvas itself, so you do not need to redraw it once you clear the canvas. In my case this solution doesn’t fit as I need to stretch the image, and moreover this feature is not supported by all browsers, actually even canvas is not supported….

2) coping “bits” from an existing image to the canvas. I choose this approach even if this requires to redraw the background after each “clear” action, as this approach is supported by all browser canvas implementations.

First two rows of code: a general style for canvas and the “large” image

image

As the image is “large” everything starts at the “onload” event on the image, that may happen seconds after the page is loaded.

Just a couple of global variables to refer to the image, the stage, and the context.

image

img variable is used only for shortening code and is a jQuery proxy for the <img>. I used jQuery only because I’m used to use it, but it isn’t a requirement.

ctx is the canvas context and is the main entry point for canvas operation (have a look at the complete reference of 2d context); here context is reached via a global variable only for shortening code but the right place (“right” in terms of object modeling) should be in the “stage” object.

stage is the “object model” of our environment, this supplies the lack of state of canvas itself, it holds all the objects of our “world” in an array.

image

First setup fills variables and then initializes the stage:

image

We are creating a canvas with the same aspect ratio of the original image. The Canvas object is our model for html  canvas, it exposes two methods: init and draw.

Init method is responsible for canvas creation, context acquisition, and events binding:

image

Draw method is called every time you need to refresh the scene (really often during interactions) and, in our example, is here only to repaint the background:

image

so, just clear and use the drawImage function to perform a bulk copy from our “large” off-screen  image to the canvas. This is a sort of powerful bitBlit operation that supports crop, translate and resize operations.

Then the Lens object: it is responsible for holding the lens position and magnification. It exposes three methods: draw, moveTo, setMagnification.

The Lens constructor:

image

A little complication here is the fact that we are zooming over an image off-screen while we are moving over the canvas, so we need some scaling factor to calculate the position of the underlying point in the “large” image.

Then lens drawing.

The lens effect is rendered by copying a part of the “large” image, eventually magnified, by cropping the image in a round shape, and applying a radial gradient on an alpha channel.

image

Note once again the usage of drawImage method to copy and enlarge the image and the  clip method for creating a circular clipping region. Then we will apply the radial gradient using color with an alpha channel.

The lens modeled using a js object makes it comfortable to have one or more instances of the same object:

image

image

Here you see two lenses with different sizes and different magnification factors.

Now everything is working but there is no interaction with the user.

Lets try to add drag&drop capability.

I have to cite html5canvastutorials that helped me understand the first steps in managing interactions.

In order to start dragging we have to intercept the mouseDown event on the lens, but as I told you before, canvas do not retain the state of the object you’ve drawn on, so you cannot bind any event on the circle containing the lens: you can only bind events on the whole canvas, so if the user clicks the mouse on the lens you will receive the event on the canvas, not on the circle.

How to determine if there is your lens under the mouse? A simple, mathematical solution is to calculate the distance between the mouse and the lens center (you have all you need, mouse x-y coordinates from the js event, and the lens center from our Lens object), then if distance is  lower than the lens radius the click was inside, out otherwise. image

This approach will work fine mainly for rectangles and circles, but how to manage a complex shape like the one in the picture? (yes, I know that this sucks!)

In this case the “math” approach is definitively more complex.

Hopefully canvas can answer the question “is this point in path?”. The “sole” limitation is that you can ask this question “only while” your are drawing, that in terms of canvas context is only between context.beginPath() and context.closePath() calls; so we have to store somewhere the mouse coordinates, then ask isPointInPath(mouseX, mouseY) and store the result on the Lens object.

Summing up: all events are binded to the canvas object, the stage redrawing is called on mouse move, and the “over” state is recorded on the Lens object. Mousedown, mouseup, and mouseleave only perform simple operations.

image

Stage holds the object currently in drag status.

Note that we move the object that is first dragged on top of the stage.stageObjects list; this will act as a z-order operation, bringing the object to the front.

image

The running example is here, and source code here under MIT licence, so feel free to change and reuse.

All the material referred in this post is in my Licorize booklet for canvas related material: http://licorize.com/projects/rbicchierai/blogmaterial/canvas

I took the photos used as examples in my travels.

Easy going JavaScript templates

Its a long time I miss publishing something interesting (ok, actually, publishing at all!) but this is for two good reasons:

one – I was really involved on Licorize development

two – I spent  one month on holidays in Iceland 🙂

three – this is the kind of blog-post that may attract lots of spit

I’m little squeamish, and I tried to delay this moment as much as I can, but Licorize beta is now available and I’ve returned happy, alive and healthy from Iceland.

Damn! I cannot procrastinate any longer.

This history started about two years ago when I found the  John Resig  micro-templating paper; John’s idea was intriguing even if it seemed hardly original: separate presentation and data. This is an old liet motif for many programming-pattern-book-writers, and this is usually enough to worn me to shun away, but in this case something hit me, say because Resig seems a practical fella or say because the <script type=”text/html” > smells of “beautiful hack”. I don’t know  why, but micro-templating remains impressed on my mind.

What is  a  JavaScript template?  In brief it is a way to call a JavaScript  function for injecting dynamically html contents client side.

The simplest usage could look like this:

var data={id:1,description:”my item”,price:”123.45”};

var place= document.getElementById(“results”);
results.innerHTML = template(“item_row”, data);

For web 2.0 applications this is a really powerful approach to page generation: send templates to clients, use JSON for communicating with the server, generate contents using templates+data and create the fastest applications you have ever seen! If you add the great support jQuery offers for JSON, this could be a really nice solution.

I didn’t get deep into Resig’ solution at the time, but I kept the JavaScript templating idea in a closet for a while,  until last April when I started working on Licorize.

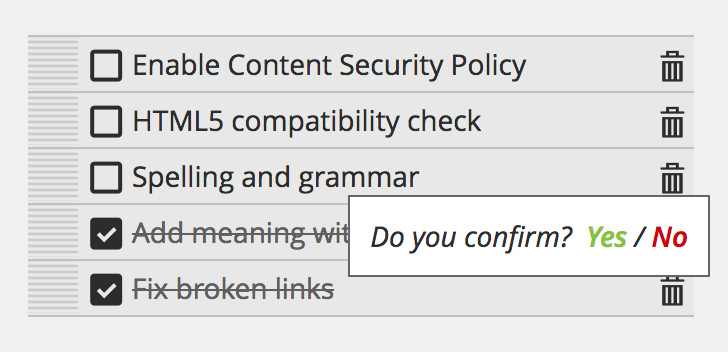
Licorize is an empowered bookmarking system that allows collecting to-dos, ideas, images and much more while you are working on-line, and then organize your work in team. But for the moment what is interesting is that Licorize uses small pieces of html to represent information on a sorted list. Here an example:

image

The main Licorize requirement was to be a fast web 2.0 application: to me this means use one page only.  I know that is not completely true, but coming from a “classical” background of Java-JSP developer, it was a revolutionary approach.

I then recalled the JavaScript templating idea, and started programming around.

A short googling on “javascript templating” left me astonished about the number of JavaScript  frameworks already available, so I started trying some of them.

Before you, dear reader, read more I warn that this is the hard core part, if you believe emacs is the best editor for writing web-apps or you think the XML-XSLT is the cleanest approach to produce html pages, leave before its too late! What you will see below is an approach that searches to maximize compatibility of writing code, also HTML, with an IDE.

Yes please, let me out!

Ok, so lets me state some of my personal principles concerning programming:

  1. a simple rough solution is far better than a powerful but complex one
  2. it is incredible stupid to invent new languages/tag/whatever while the existing ones work just fine
  3. your designer’s work worth as much as your “dirty code”
  4. you cannot nowadays write code without a decent IDE, or better: you cannot write decent code without a great IDE!  This is why I use IntelliJ!
  5. every trick is legal if it makes your life easier (not only writing code 🙂 )

Taking in mind these points I started exploring the JavaScript template galaxy.

Starting from Resig’s example I noticed that the suggested syntax generates confusion when you use a .jsp to generate the “template” page. JSP standard tags are also used for defining JavaScript variable placeholders:

Actually the following code, from Resig’s example,  generates panic in most JSP coders (Example 1):

<script type=”text/html” id=”user_tmpl”>
<% for ( var i = 0; i < users.length; i++ ) { %>
<li><a href=”<%=users[i].url%>”><%=users[i].name%></a></li>
<% } %>
</script>

here “users[i]” is a JavaScript variable not a JSP one!

If you think that generating templates using dynamic pages is useless you are on the wrong path, in good company with those that think that out.print(“<%=users[i].url%>”) could be an acceptable price to pay for using templating – no way!

Analyzing this example I found that is not strictly necessary to have iteration or conditional support in the template definition language: you can narrow the scope of templates and use JavaScript for doing iteration. With this approach you gain flexibility and you do not need strange syntax. See the code above transformed (Example 2):

<script type=”text/html” id=”user_tmpl”>
<li><a href=”<%=users.url%>”><%=users.name%></a></li>
</script>

<script type=”text/javascript”>

for ( var i = 0; i < users.length; i++ ) {
template(“user_tmpl”,users[i]);
}
</script>

The code is a little bit longer, but more readable and flexible (e.g.: if you need to use a different row template in function of user data).

What in Resig’ approach is in the right direction is that the template is mainly written in html, that means that templates can be created by UI guys, using (almost) standard html tags.

If you believe that this is the most obvious approach, and that everybody would start with this, you are wrong: there are lots of libraries where the template is created with “string concatenation”.

Seems peculiar to me that  library writers are mostly focused on implementing “for”, “if”, “while” statements inside templates instead of making it easy to write them down. Why they want to waste its time implementing (badly) something already happily existing in JavaScript?

In this category mustache.js , Tempest or nano, but the list is far from being exhaustive.

Some other libraries have the sensibility to propose a way to write html in a more comfortable way; usually they use the trick of “<script type=’text/…..’>” tag, as proposed by Resig or a in a mixed way with  “<![CDATA[“ tag

In this category there are  jQuery TemplatesjQuote, Srender.

A special place in my heart is the pure templating framework. It is at first glance a really clean solution, but going in detail this is a sort of exercise of sadism. Do not misunderstand me, I really appreciate the power of this library and the effort to use standard like css selectors, but are we sure that this stuff is a good thing for humanity?

image

By the way, the above code and (Example 2) produce almost the same result. Which one is more  readable? 😉

As you can guess I left this framework as fast as I could moving to ones closer to html.

After the scary templating tour I got a clearer vision of my requirements:

  1. templates’ html MUST be writable in HTML not in JavaScript
  2. templates must work with the IDE, not against it
  3. in templates it should be possible to include a “<script>” tag
  4. templates should be generated dynamically server side

From now on, I will be using jQuery by default in the code.

In Open Lab developers work side by side with graphic designers, so the closer to html is the solution the easier is to interact with each other. Resig’s approach is in the right path, but look what happens inserting his kind of template in a .jsp page:

image

There is no way for the IDE to distinguish between template-language and jsp-language.

Another problem was the <script> tag used to identify the template that, on Chrome browser only, conflicts with standard <script type=”text/javascript”> tags.  Why I need a nested script tag in the template? I’m a little bit reluctant to tell you, but sometime I use old third party server-side components that produce some JavaScript code within the component itself. Bleah! (Still, I’m confident that most of you do just that…). And this would not be allowed.

After testing lots of different solutions, the best one  I found is to include  my template in a <div> with all the contents inside an HTML comment block. My solution has of course the limitation of forbidding the usage of html comments in templates, but it is an acceptable limitation for us.

Here is how it  looks like:

image

Regarding IDE compatibility, as you can see above, the html comment blocks code completion, syntax checking and hints. A little workaround solved the problem: I built a small java class to print the same template stub:

image

this solution preserve all IDEs capability as error highlighting, tag matching, JavaScript  checking, hints – and my happiness!

Seems peanuts, but this can speed up development a lot!

Here the simple class that wraps template tags:

image

In order to solve mixing jsp tags with templates, I decided to drop the use of  “<% %>” using instead the less disturbing “## ##”.

So a simple template example will look like:

image

The last blow dealt to “things well-done” was to remove any statement inside the template; so no “for”, “if”, “while” etc.

Maybe you can now argue that this leaves the template too poor and inexpressive, and actually it is true. This is why we added a callback function for “decorating” the resulting html. The decorator is generally not necessary and it is used only for really complicated and hyper-active templates.

We’ll now go in deep on our template solution analyzing each step:

Template definition

Write your template in a page (jsp or plain html) using the stub described above. In case you will use a .jsp page for carrying the template you can use the JST class methods to wrap the template transparently from the IDE point of view.

image

Here I created a div identified with “stripTemplates” to carry templates; in this example templates are inside my main page in order to minimize requests, but you can easily load templates in a subsequent ajax call.

Load templates in memory (the DOM)

Once the page is loaded you have to load templates in memory. You can have more then one template both in the same html block or in different ones.

A typical usage:

image

Once templates has been loaded, the container is removed. I tried to keep templates in the page and recall them from there, but it was less performant, so I opted to keep them on a JavaScript variable.

Have now a closer look to the loadTemplate() method:

image

we get all “.__template__”  elements and then the first comment child-element. We support multiple templates for each container. Then the template is loaded in memory end removed from the page.

If you want to load templates in a distinct ajax call something like

image

should work fine.

Getting data

This is the easiest part: usually you will call your server to obtain a JSON object or JSON array, obviously your data should be “compatible” with the template you are using.

For instance data compatible with templates above could be:

image

data can be with more properties than required, in this case extra data will be ignored, or with less data and in this case the “##..##” placeholder will be removed before template is rendered.

Rendering a template

Finally we can render the template and draw it somewhere on the page:

image

“createFromTemplate” will receive JavaScript data and return a jQuery object that you can handle for further refinements or just append somewhere.

Have a look to the rendering function:

image

code is quite straight: the template (string) is recalled from memory, then for each attribute in “jsonData” we replace “##attributeName##” with its value. Remaining “##…##” are then removed. A jQuery object is then created and returned.

Probably some of you noticed the “decorator” call before returning the object.

Decorators

As I told you before, we decided to remove statements inside template definitions, this does not mean that you never need some “logic rendering” for the template, I only oppose writing logic inside the template,  with some bizarre and original syntax! This is why we use a post-processing approach based on classical JavaScript callbacks.

You can define decorators in this way:

image

your decorator will receive the rendered template and the data, so you have lots of flexibility. Of course here we suppose the decorator is used for fine-tuning the final result not to twist the layout completely: we require layout to be clearly readable on the template itself. If you need a completely different structure depending on data received, simply use multiple templates; this is by far a better solution with respect to making templates excessively complex.

Decorators are the best place where to add event listeners and behaviors on your resulting component.

Conclusions

I know that this is a rough, non-conformist, maybe ugly approach and that this is not suitable for everyone, but it works really well in our group making happy both programmers and designers.

I think this was a great goal!  In only sixty lines of  code!

Love,

Roberto

P.S.: You can see templates at work here in Licorize.

P.P.S: You reader are probably the only one surviving up to this line, as a prize there is a complete code example here.

Ultra-light jQuery calendar

CalendarPicker: a new concept for date selection.

Read the component history.

Sometime I maintain my promises (rarely indeed 🙂 ), so I worked a little bit on CalendarPicker, receiving some suggestions from my previous post.

First of all thanks to everybody for precious feedbacks.

The hottest news in CalendarPicker is the usage  of mouse wheel to change dates; it is enabled on years, months and days bars.

I used the great mousewheel plugin by Brandon Aaron; just include the script for activate it.

Then I changed a little the CSS to enhance “today” with a yellow border.

image image

Another new feature is the ability of customizing the amount of  years/month/days displayed, so you can have bizarre configurations like these:

image image

Maxime Haineault argued that the next/prev buttons are no fashionable: now you can hide them!

Introducing the wheel movement I had to optimize calls, so callback function is invoked only when the user stops to play with the wheel.

I tried to maintain the code short (actually 180 rows), but the customization of years/months/days requires some computation for cell size; I first tried using only css properties in order to makes cells sharing space equally, but no luck. I need a css-expert’s hint!

You can see CalendarPicker at work here.

Feedback welcome!

So hard to have a date

An overview of 13+1  jQuery calendars, and a new ultra-light calendar picker.

When I was teenager (oh God, so many years ago!), my secret dream was to have a date with Elisa, curly hairs, blue eyes, tall, wonderful, curvy-classmate; actually this was the secret dream of every boy in my class. Unluckily  I looked younger, thinner, callow then others boys, so there was no chance of it coming true. So I decided to learn programming!

Today, I still need a date, well not the same kind of  “date”, a “date” in the sense of calendar ones, amazing how the years change your priorities!

Developing a new secret product (actually Licorize!) I needed to pick a date in order to roll-unroll the user log.

Using a third party component is a way to speed-up my development,  I narrowed my research to jQuery components; probably there are lots of calendar component for motools,  prototype, or stand alone ones, but jQuery is my choice, not going to change that!

I initially thought this was a simple quest: “of course there will be thousands of date pickers to choose…”

But nowadays is still hard to have a date, at least in a stylish way…

…  (if you want to see my component at work just go straight here ).

Here is the list of calendar components I’ve tried (before developing my own!).

Eyecon Date Picker

Firstly I came to Eyecon Date Picker. This is a really nice component. What I loved on this component is the flexibility for moving far in the past (or the future) with few clicks. imageimageimage

Clicking on the top row the component changes “scale” moving through years or months.

Date Picker  is released under MIT and GPL license, so it is usable also in commercial products (that actually is my case).

Date picker is fully skinnable, is quite light,  and really easy to use.

Basic usage is really straightforward:

$('#date').DatePicker({
	flat: true,
	date: '2008-07-31',
	current: '2008-07-31',
	calendars: 1,
	starts: 1
});

Another interesting feature is that it supports period selection:

image

and a cell renderer that can be used to highlight holidays, disable some days or whatever your application needs.

I was so happy to have found this component that I included it immediately on Licorize, before discovering a little spot that made me discard it: when you change scale by clicking on a month or on a year it closes the popup (when in popup mode). It is completely acceptable in mostly cases, but unluckily not in mine.

jQuery UI Datepicker

Then I tried the “standard” jQuery UI Datepicker, that is a really rock solid component. imageSupports keyboard navigation, internationalization, lots of options, events, and methods. It is skinnable with ui theme roller.

It is hard to find a component so well engineered.

It relies on an input field, this means it is intended mainly for  data insertion. It can be used as stand-alone calendar too.

Probably playing with the options you can steer Datepicker where you need.

The minimal usage is really “minimal”:

$("#datepicker").datepicker();
...
<input type="text" id="datepicker">

On the other hand,  mastering this component is not a joke with dozen of parameters. Even the weight is considerable (if you are interested in this single component only). This happens for every jQuery.ui component, either you accept it and embrace the whole platform or you extract a single part – it may be hard. This is why I didn’t adopt it.

Date Range Picker

An interesting extension of jQuery.ui date picker is Date Range Picker by Filament Group.

This manifests the quality of ui components. Seeing this component at work is quite impressive:

image

It supports preset ranges in menu (e.g.: “Office closed”), range clicking and other catching features. In one world power, but definitively not lightness!

jQuery Datepicker

Keith Wood  released jQuery Datepicker under both GPL and MIT license.

Great the demo/documentation site!

imageimagejQueri.ui datepicker is based on this component: the ui one has only less features… this should give you an idea about the power of this plugin.

Every kind of feature is supported, multi-languages, cell renderer, range selection, inline, years/months fast switching, cell disabling, date formats, multi events and much more.

The usage is simple, as simple as your requirements are.

Keith developed also the Date Entry plugin image a single input field with a pad for changing date fields.

jQuery date picker

Kelvin Luck gives us a strong jQuery date picker. It is unobtrusive and really well documented, lots of use cases are ready to be used.

image

It can be used both inline or as input field, in single or multiple views for period selection.

The basic usage is the standard one:

$('.date-pick').datePicker();

It supports internationalization and cell rendering.

Probably the look-and-feel is not at the top.

jCalendar

imageI have to cite the jCalendar by Ted Serbinsky:

This is an outdated component and how the author says “this project has been  superceded by the most excellent jQuery UI

So why didn’t I  believe in Ted and do the same thing? We’ll see that after all the reviews.

jQuery date-picker

image

Now is the turn of  Ted Devito with jQuery date-picker:

This is a quite rough (and even uncompleted) component, at least compared with previous jquery ones, but at least it has the gift of simplicity.

Usage is in jQuery style:

$(‘input’).simpleDatepicker();

jQuery Calendar Widget

Then I found jQuery Calendar Widget Plugin by Ei Sabai Nyo that is by far the most compact calendar I ever found: 99 lines of (unpacked 🙂 ) code!

image

Ok, probably it is not so powerful, but can be easily integrated and used in your applications; yours, not in mine!

Dyndatetime

Dyndatetime is an iron-looking date selector. Releases under GNU by thetoolman, it has a cold appearance, but is filled of interesting features. First of all it allows fast year switching by holding the fast back /forward buttons.

imageimage

Documentation is at least weak, well ok absent, but there is a test page with a couple of examples. It supports multiple languages, date formats, time formats (!)  and some small custom features. Easy to use and effective.

jCal

imageAnother nice example is jCal by Jim Palmer.

This is a multiday calendar date picker. The focus here is on date range selection, but this seems a nice piece of code.

It is released under MIT license.

jQuery Date Input

imageLast but not least is the jQuery Date Input by Jon Leighton, “no frills”, as the author says. “No frills” but a really mature component. Release under MIT license supports all main features like first day of week,  date formatting, css.

Stable and cool, is really pleasant to use.

But it is still not on my way.

… and now?

At this point you are probably asking what I’m looking for: well have you seen on these components a shine of innovation?

I want something more, more original, prettier, cool… not another grid, please!

Someone can argue there is no reason to innovate on calendars. A calendar is a calendar, full stop!

Well I’m usually reluctant to change user habits, but sometime I need fresh new air. Licorize, ops, my secret product, is full of new user interface techniques, so why not innovate moving in time?

The inspiration come to me looking at jQuery timepickr by Maxime Haineault:

image

This is a new way to select hours. It’s usage is practical and immediate. The author was brave in choosing to accept the practical limitation of 15 minutes steps, that could receive lots of user complaints, but this always happens when innovating.

And now, I’m proud to announce my new free-light-weight-jquery-date-picker…

(read about the new version here)

image

At last I decided to develop my own component. I called it CalendarPicker (try a demo here). Calendar picker is released it under MIT license.

Eureka! It looks different from all the others, supports multiple languages, and allows fast movement across months and years.

I know that this approach is not suitable for every context, but I hope someone else will find it useful.

The basic usage looks like:

$("#calendarFilterBox").calendarPicker();

Of course you will probably need to do something with the selected date 😉

In this case the callback function will help you:

var dateSelector;
$(function(){
  dateSelector=$("#calendarFilterBox").calendarPicker({callback:function(cal){
    alert(cal.currentDate);
  }});
});

A function will allow to change the current date. For instance to set date to today:

dateSelector.changeDate(new Date());

A more comprehensive example with names customization looks like this:

$(function(){
  dateSelector=$("#calendarFilterBox").calendarPicker({
    monthNames:["Jan", "Feb", "Mar", "Apr", "May", "Jun", "Jul", "…more…],
    dayNames: ["Sun", "Mon", "Tue", "Wed", "Thu", "Fri", "Sat"],
    callback:function(cal){
       $("#mydate").html(cal.currentDate+"");
  }});
});

Your feedback will be deeply appreciated, as always.

An html sanitizer for C#

sanitizer After 3 months gestation and some bug fixes, HtmlSanitizer is reporting no hacking successes.

Does it mean that it rocks? I don’t think so, but it is probably strong enough to sail in stormy waters.

See my previous post to know how it works, but mainly test it online with the Patapage playground.

Being honest I received some complaints concerning the black list approach to CSS styles, but no one has hacked the current version (yet 🙂 ). In any case the code is open to changes, and I’m happy to receive your feedbacks.

Now we are proud to announce that there is a porting to C# by Beyers Cronje (thank you). You can find C# sources here (and Java ones here).  Warning: source code is already patched as suggested by Isaiah.

Other portings are welcome!